DIY Invitations:
After tossing around several ideas for their invitation, I ended up making them this way. Cardstock, my computer's clipart, a ruler, a paper cutter, and a little rick-rack were my best friends for this project!
First page: Dinosaur--"Stomp, stomp, stomp! Look at me! I'm turning three!"

Second page: Ballerina--"Plie, pointe, and pirouette for fun! Because Mia Lillie is turning one!"

Third page: Combined party information (address blacked-out)

DIY cupcake wrappers and toppers:
This is my latest DIY project that I'm loving for sprucing up cupcakes! As opposed to doing a lot of decorative icing, these wrappers are easy to make and can be customized to any party. I just found a template for the regular-sized cupcakes online (I can't remember the exact website, but there are plenty out there), and just altered it for the jumbo cupcakes. Loved the way these came out! And I'm still kicking myself for not getting a picture of the whole cupcake display! It turned out so cute, but oh well...
As far as the toppers, I simply bought the wands (pks of 12) at Hobby Lobby for the tutu cupcakes. For the dino cupcakes, I took foam dino stickers (again found at Hobby Lobby) and hot-glued them to toothpicks. I left the paper backing on the stickers, thus making them not stick to everything and being able to reuse them for thank-you notes (you'll see those on down).
Birthday boy cupcake:

Guest cupcake:

Tutu cupcake information: In addition to the wrappers for the tutu cupcakes, I made miniature tutus! This was so fun, although a bit time-consuming! I cut pieces of tulle, punched holes at the top, laced the ribbon through, tied the ribbon together, and added tape to the front and back to secure it onto the wrapper. I only had time to do 12, so for the additional cupcakes I used a stamp to make the wrappers that said "Mia is one!" Great thing about the tutus is that they are reusable since they were taped to a paper wrapper--so although time-consuming to make, I can reuse them! And as a sidenote, I used a single layer of tulle for the guest cupcakes, and used three layers for the birthday girl's jumbo cupcake!


DIY Decorations:
I had three main goals with the decorations--1) keep it simple and easy to do (pendant banner), 2) focus on the kids development over the year individually and together, as well as, sharing memories from the year (picture clotheslines), and 3) make it personal to each of them by adding individual touches (table centerpieces).
Pendant Banner--I ordered these two fabrics online (fabrics.com) and after looking at several other blogs, decided on the size of the pendants (which I can't remember exactly what I did, but I think it was around 9in across the top and 13in down the sides). I simply cut the pendants to size, cut out letters from felt, and hot-glued them on. I used twine and mini clothespins to put the pendants up, so it was a no-sew project (didn't have time for that!).


Picture Clotheslines--It took time to choose pictures from the whole year, but after doing that, I sent them to Walmart.com and had them printed. I made little tags to indicate the months throughout the year and any special events (Easter, baby dedication, etc). I used twine and mini clothespins again and hung them up!
Brother/Sister clothesline


Top line for brother, bottom line for sister


Sister's 9 month photo shoot:

Table centerpieces--I used burlap as the base for the centerpieces (my go-to fabric for just about everything). Then used scrap denim fabric and tulle for each display to add softness and another layer. I used theme-appropriate books that the kids already had. I liked this idea to personalize it because reading books to the kids is something I try to do everyday. I added dinosaur figures to Luke's side and pointe shoes to Mia's. I made the number picture holders out of wood numbers that I painted (originally black, found them in Target's dollar bins), a clothespin (to hold the picture) and alphabet stickers. To finish each side, I added the footprint and handprint artwork. I LOVE these and now have them hanging in our kitchen! Mia's was done as a craft in the nursery she goes to on Wednesday mornings (how fun it was to get it when I picked her up and the fact that it mentioned ballet in the poem!), which inspired me to do the handprint dinosaur for Luke. I had tossed around the idea of doing his invitations with a handprint, but after deciding that that would be too time-consuming, I wanted to use the one handprint I made. So I used colored pencils to make his hand stand out more and then drew additional spikes to make it look like a stegosaurus! I found the poem online and couldn't believe it actually mentinoned dinosaurs in it. I loved these as decorations and I love the fact I can have them as keepsakes.


DIY Party "Games" and Favors:
This year I wanted to have a couple of little activities for the kids to do, so we decided to go with a "dino bone dig" and a "fairy ballerina fashion show"! This was super easy to set up. We used our sand table (another DIY project of my dad's which I'll post about soon) for the "dig site." I used our small kids wheelbarrow to put the digging tools in. I used twine to divide the table into quadrants and made these cute "bone bags" (Halloween treat bags I found at Target for 3/$1) personalized to each boys' dino name (we had Luke-o-saur, Brooks-a-tops, Deac-o-don, and P-Rex!) Found the digging shovels and rakes at Walmart for $0.50 each and got the skeleton dino bones at the Dollar Tree, a pack of 2/$1! This was so fun and one of the highlights of the party! Each boy got a personalized dino hat also (hats found at the Dollar Tree too and I used a chalk pen to write their names)!
For the fashion show, we let the girls sit on their "pink carpet" and show off their fairy wings (another Dollar Tree find) and wands (from Hobby Lobby). We had a cute photo opp and they were just too cute!
I also set up the "Dino Diner" for the boys food. This was just a little fun way to serve their lunch. The sideboard I used is lower than a table, so the boys were able to reach and get their food easily. The signs were super easy--just a quick print-off from the computer and using a glue stick to attach them to cardstock.
Along with the dino hats and dig bones, the boys took home dino coloring books as favors. Fairy wings, wands, and fairy storybooks were the ballerinas' favors. We also had two in-utero babies come to our party so they received a couple of baby storybooks!:) I easily wrapped all the books with celophane basket wrap (one of my favorite ways to wrap gifts) and made the gift tags with extra cardstock and the stamps I used on the cupcake wrappers.
Dino Dig


Fairy Ballerina Fashion Show


Dino Diner

Favors


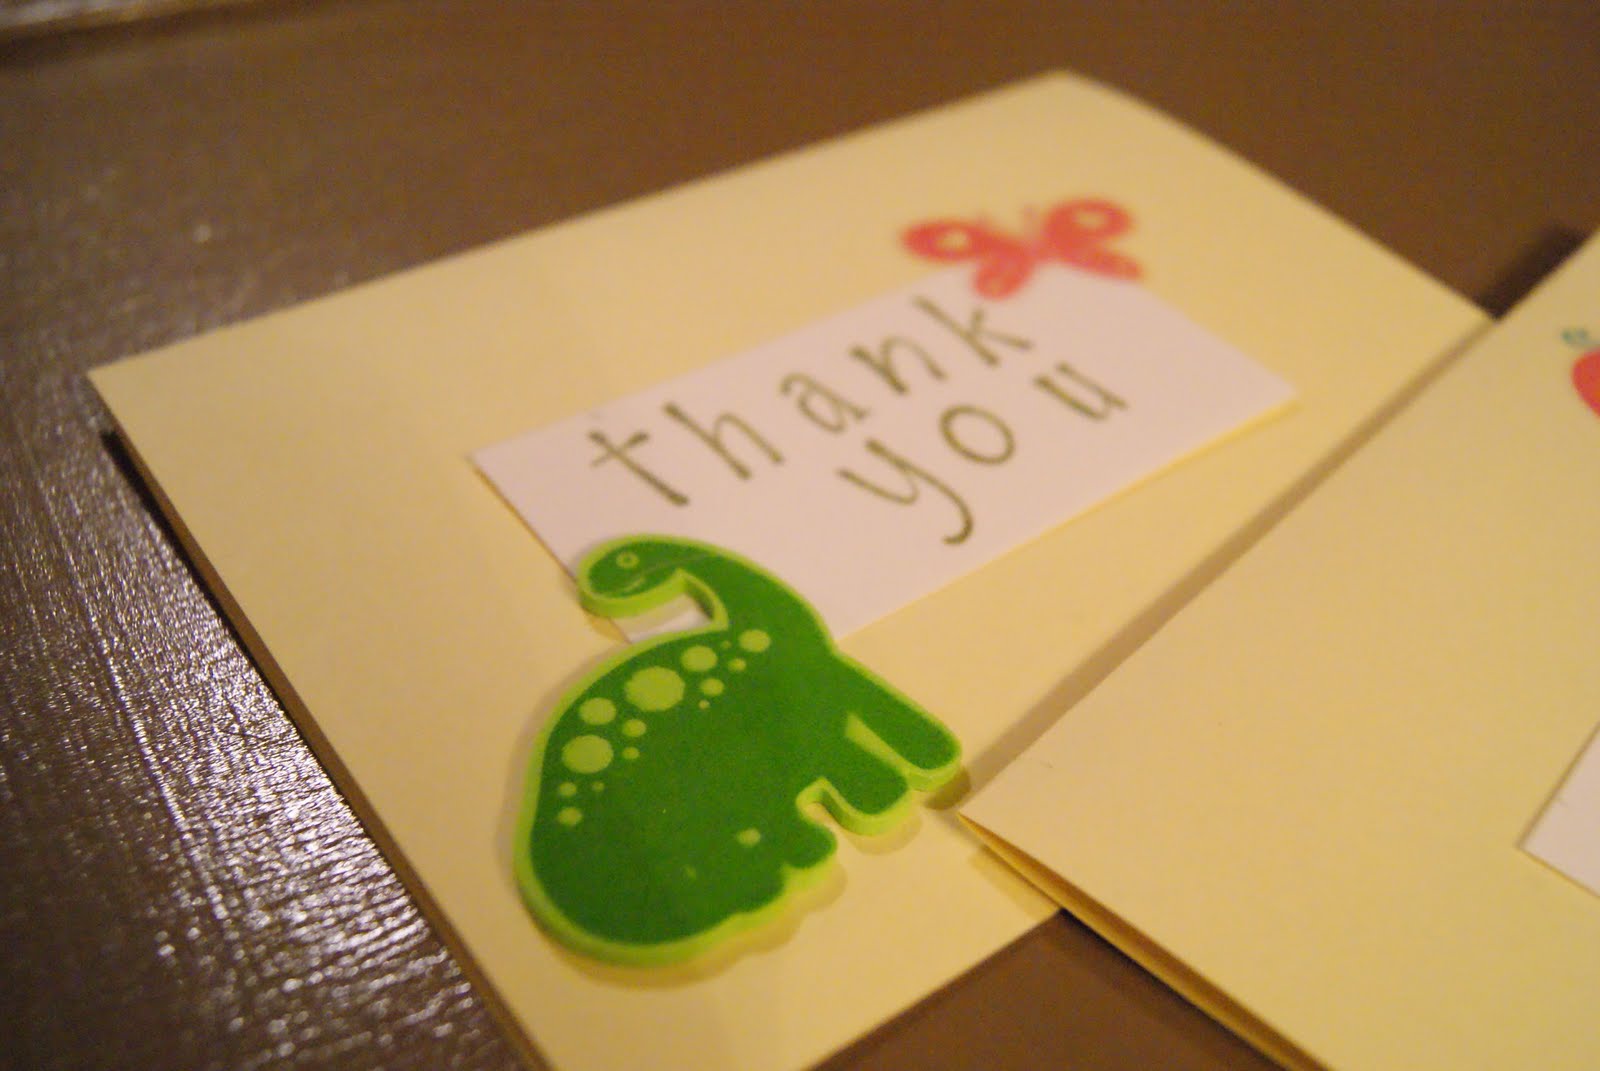
DIY Thank-you Note:
And finally, the thank-you notes! I knew I wouldn't be able to find notes that had both boy and girl themes together, so I just made these out of cardstock, recycled dino cupcake toppers, and little butterfly stickers (that I thought looked like the fairy wings). I used the same stamps again to do the "thank you" and then the birthday boy (because he's the only one who can color right now) personalized the inside with his own thank you artwork:) I used some left-over envelopes from last year's Christmas cards which happened to fit them just fine.


Overall, it was such a fun party! I really think the kids had a blast (mine and those who came!) which makes all the work worth it. I had so much fun putting these personal touches to each thing. I hope you've gotten some ideas you can use too and I'd love to hear of anything that you have done for your kids!